Thursday, October 27, 2011

Term 3 session 8

Finally we have finished all the collaborative murals and the individual compositions (phew! everyone worked hard - no time for talking).

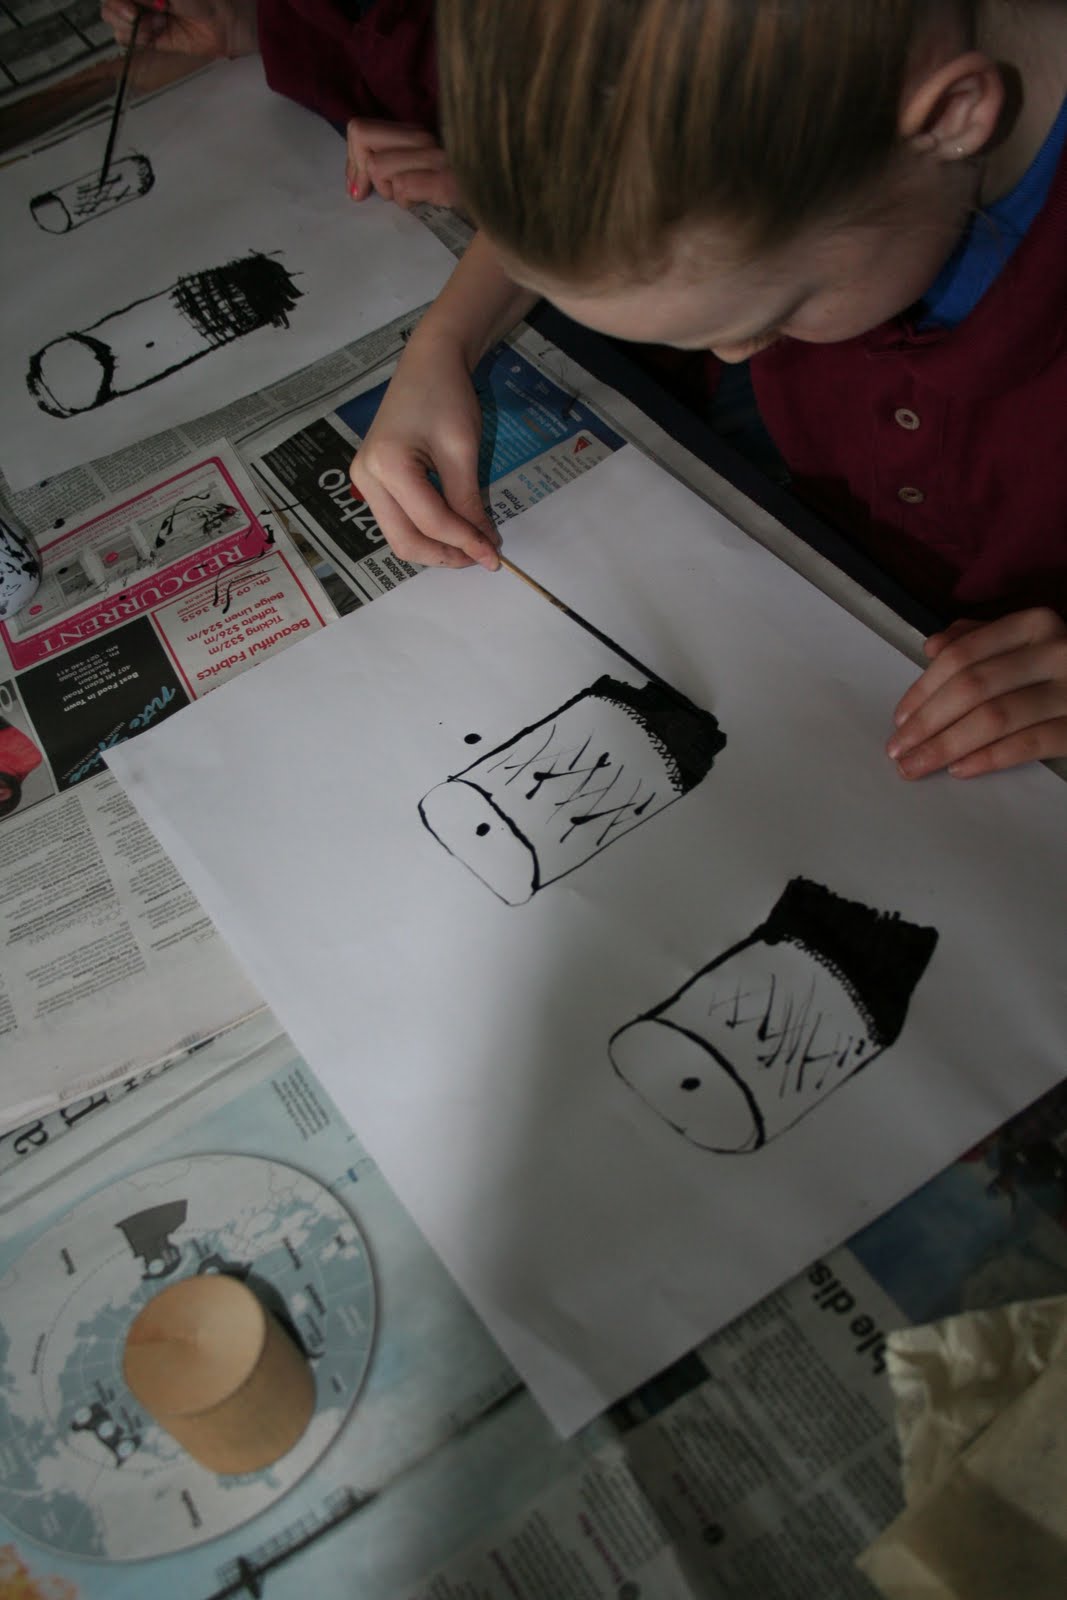
As the students worked on their composition their learning was very evident. The use of tonal change, using patterns of dark and light, seeing how light on dark or dark on light throw the focal point forward, were part of the learning. Towards the end of the process the students were going back and reworking parts of their composition they had done earlier.
As each composition was finished we all stopped and talked about it, giving positive feedback and identifying parts that needed to be changed to increase the impact. This had a two fold effect: the compositions had time to be improved and by giving or listening to the feedback students re-looked at their own work and made changed if needed.
Graphite pencil

Graphite pencil and charcoal

Indian ink and white paint

Graphite pencil

Graphite pencil


I was impressed by the quality of evaluation and how the students used the art language to articulate. Yeah, they have made the connections.

The collaborative murals have also been a learning curve in how to work as a team. The effort of all the team members was visually evident and they soon realised if they didn’t strive for quality the piece they were working on did not fit in with the rest. Everyone took ownership and helped each other ensure the style or technique of the model artist was maintained.
Model artist Syliva Siddell

Model artist Vincent van Gogh

Model artist Syliva Siddell

Model artist Leonardo deVinci

Thursday, September 15, 2011

Term 3 session 7

Major teaching component this morning. Using geometric shapes borrowed from the maths resources we revisited drawing 3D shapes by finding angle of each line. This is done by holding the pencil or drawing instrument at arms length, closing one eye and lining the pencil up with the focus line on the object. By putting the pencil straight down on the paper without changing the angle it gives a pretty close line.

The children had to look closely at the shadows and light. By turning off the classroom lights the nature light coming through the windows made the shadows and light more obvious on the objects.

During this activity we used different media: charcoal, charcoal and water, graphite pencil and rubbing back, indian ink applied with a stick and indian ink and thin white paint applied with a brush.

The learning of shapes, shadow, light and the different media are building the tools required for the children to create their own composition.

Planning the composition:
The criteria:
The slit view finder must be used (no whole objects are to be drawn, only parts of things)
The media must be a combination of charcoal, charcoal and water, graphite pencil and rubbing back, indian ink applied with a stick or indian ink and thin white paint applied with a brush.
A completed artwork will be A2 size.
The composition will be made up of a series smaller images put together like a collage.

The subject is up to the children as is the format is their own design.

We started the process by writing things that interested them, it could be anything.
Next we chose two things from the list that exited them most.

Another brainstorm to write everything possible pertaining to that topic, item or thing.
We repeated the process with the second most exciting thing.

Next they had to chose the least favourite on the initial list, it could also be the one they thought would be the hardest to do. Same process used as above.

After choosing the list they were most excited about (and yes some changed to the least favourite because they had initially thought it too hard) the children had to start drawing a few images from memory. This task help them to realise their next step in the process.
To conclude this session they made a list of things they need to being next week,
objects and photos many.

The children left the room buzzing about what they were going to do.

Sunday, September 11, 2011

Term 3 session 6

Time to learn about shadow and light.
Most objects are make from a variation of geometric shapes. Sphere, cylinder, cube, rectangular prism (cuboid) and triangular prism. To understand where light falls on a shape and how it creates a shadow will help create a three dimensional effect when drawing and painting.
Language to use when describing tonal change (also known as value).
Light tone - whisper
mid tone - talking
dark tone - shouting

I demonstrate with a large ball, we observe where the light comes from and the shadows that are formed on and below the ball. When drawing a cylinder we use the same process of observing light and shadow on a tin can.

We started by drawing a circle with charcoal. Charcoal is an excellent medium for making shadows and tonal changes, it is soft and easily smudged.
After drawing the dark (shouting) shadow at the bottom of the circle, use your finger to smudge in the mid tone (talking). The light is a circle at the top to the larger circle on the side the light source is coming from. An eraser can be used to remove the charcoal. It is easy to use mid tone and rub back to light. Rub or smudge the charcoal in the curved direction of the sphere. If you smudge straight across it will flatten the 3D effect.
After the ball is complete add a table to sit the ball on and a background to give it a location.

This learning will continue until we have experienced all shapes.

Next on the agenda:
Sketching using a slit or very narrow viewfinder (can’t think of another name to call it). By using the slit viewfinder the children only draw part of an object. They use the viewfinder as a grid (middle horizontal, middle vertical, high and low horizontal lines and vertical left and right line). By using the grid the image will fill the whole page.
It took a little whole for the children to understand they had to use the viewfinder as a grid, but once they had the sketching became easier for them and the images became realistic. They also had problems with only drawing part of an object after being so used to drawing whole objects.
These sketches will become the base of a larger composition.

In the afternoon we continued to work on the collaborative murals. These are coming on and the children are becoming more confident about their work. They need to be reminded to look at the techniques their artist has used.

Friday, September 2, 2011

Term 3 session 5

We started with a warm-up of drawing a chair by concentrating on the negative shapes around it. It is easy to see if the child is not looking at the negative shapes. They find is difficult to get the proportions right and the left brain tells them the chair has four legs all the same length and that is what they draw. By drawing the negative shapes (right brain) the proportions and perspective automatically happen. (Drawing with perspective the legs of the chair are not all the same length). Quite amazing really, the drawing are far more accurate.
Two examples
drawing one: the chair (positive shape)
The child drew the positive shape then coloured around the negative shape

drawing two: the chair (negative shapes) This child drew the negative shape and coloured each segment as they drew.

The collaborative murals.
The hard work of putting colour on the murals has started. The groups had to decide if they were going to use crayon or pastels to colour. The next step was to decide on the colours to be used. The children have to look at the pictures they copied and colour in the artists style. Some progress was made, hopefully they should speed up as confidence builds. It is good for the children to realise that quality artwork takes time and effort and sometimes you get sick of doing it but perseverance has to prevail.

Thursday, August 25, 2011

Term 3 session 4

After a warm-up drawing grid pictures we got onto discovering positive and negative shapes. Some children realised straight away that the space around an object is the negative space/shape and the object is the positive one.
The children chose an object and drew it as a positive shape. By the results this was do with the left hand brain, you could tell what the object was but is was not accurate. Next they drew the air around the object (the negative space) and coloured in the space leaving the image of the object blank. This was just done with pencil. To encourage the children to be bolder in applying the lines and colouring, we then used indian ink and wooden skewers. The negative shapes they produced were far more accurate.
By concentrating on the negative space the left hand brain is quiet (does not like this concept of thinking) and the right brain does the observing. I am thinking that by using indian ink (an unfamiliar medium) the left brain can not cope allowing the children to really concentrate on the spaces.

Continuing with using the picture planes we drew a portrait of each other and transferred them onto graphite paper. This was a challenge for some, but the final product also showed me I need to do teaching on shadow and light, and the shape and construction of facial features.

The initial sketching on the collaborative murals have nearly been completed. The children have decided on how they are going to colour them. Progress...


Wednesday, August 24, 2011

Term 3 session 3

Drawing with a picture plane produced great landscape sketches. Taping the viewfinder, with clear plastic (over head projector transparencies) attached, to the window of the classroom the children draw the scenery outside with whiteboard marker. We have a lovely view of the playing field and trees.
The children then prepared graphite paper (using a graphite pencil lightly rub pencil all over white page as smoothly as possible, then smudge with tissue paper. This gives the paper a grey cover that can be made darker or rubbed off the show light areas). Using the grid they transferred the image from the picture plane onto the graphite paper.
To add to the details they applied darker areas and rubbed off the light areas. The sketches showed perspective and depth. After the sketches were completed the children looked at the scene again and critiqued their composition. Next time we will look at the line of thirds to get more balance between land and sky.


In keeping with the drawing theme and looking at line and shape the class has split into four groups and have begun drawing collaborative murals.
The drawing are on large pieces of cardboard pinned to the wall. Each group selected an artist they liked (Vincent van Gogh, Silvia Siddell and Leonardo da Vinci) They copy pictures of paintings and drawings done by the artist. The murals will be like a collage of the images. Each child starts a drawing, after about 10 minutes of drawing they swap with someone else and continue to draw. They swap many times so each child works on most of the drawings on the mural. This process makes a true collaborative artwork. The children are not precious about their particular drawing and work together to create the overall composition. A work in progress...

Tuesday, August 23, 2011

Term 3 session 2

Drawing using a picture plane. Materials required for this exercise are: an A4 viewing frame, A4 clear plastic sheet (over head projector transparencies are ideal), masking tape, pencil, paper, eraser, whiteboard marker, tissue for wiping and a window with a view.

First exercise is to talk about a picture plane and how the old art masters used them. Demonstrate by drawing the view on the classroom window with whiteboard mark. To do this keep your head as still as possible (it is amazing how your head moves when you are trying to keep it still), shut one eye, put the marker pen on the window and draw the lines seen in the view. Step back and look at the drawing, you will notice how the drawing shows depth and perspective. Allow the students to give it a go. I also got a student to stand outside on the deck and the children inside draw them on the window. You can really see the likeness in the drawing.
Before getting the students to draw their own hand using the picture plane I taught them how to use a graph to copy an image from a picture. (I have learned from experience, that it is important to give them the tools they need before introducing them to new skills.


To draw the hand prepare the view finder by taping the clear plastic on to the view finder and then draw a cross line through the middle - see diagram.
Get students to rest the view finder on their hand. Curl the fingers up and hold the plastic above the inner hand. Now draw the lines of the hand in the plastic using whiteboard marker. When complete place the plastic onto white paper and see the results. If the lines are not correct or if the hand or plastic move, rub the lines out and start again.
Now using the knowledge of using a graph, get the students to copy their hand drawing from the picture plane onto white paper.

The students were amazed at the results and complemented each other on their drawing ability. Nine and ten year old coped with these exercises well.
Next time the students will be drawing everyday objects using the picture plane.